I have a pet saying that I repeat every time I teach a photo workshop. You can buy the best camera in the world but if you never develop an eye for the image, all you’ll end up with is technically perfect crap. It’s like the old joke, “It’s not the size of the wand; it’s the skill of the magician.”
I got a great compliment years ago from one of my directors at KCET when we were looking at some of my slides and she said, “You’ve really got a great eye.” Now in the vernacular, developing an “eye” for the image means not only that you can find something but that that you can “see” how it can best be shot and what angles will produce the most interesting and pleasing image. Your goal should be to get people to go, “Wow!”
In my opinion, this goes beyond whatever “rules” you might have been taught about photography. You can take every one of the rules and find an exception. There are great images where things are blurred, where areas of the image are dark or overly bright, and which don’t follow the Rule of Thirds. Yet even so, they are stunning images.
In my mind, your goal should be to produce an image that affords the viewer a unique perspective of your subject. That’s one reason I like taking macro shots or even what I call micro-macro (macro lenses with a close-up lens on top, also known as super-macro). It gives the photographer a chance to shoot teeny little animals and present them in a way that we don’t normally see them. That will have visual impact and will produce that chorus of people going “Wow!”
There are certainly things you can do to increase your odds of getting a shot you’ll be proud of. Two of the easiest are these: (1) Get lower… and (2) Get closer.
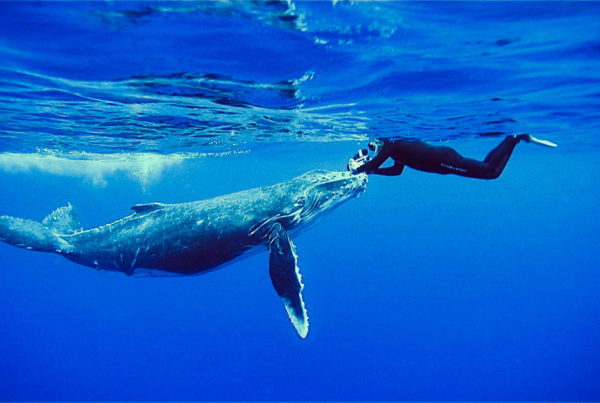
Too often, we see photographers shooting almost straight down on an animal. That generally won’t be pleasing to the eye. (Again, there are exceptions to this.) What you’d like to strive for is to get level with the animal or even slightly below it. A slight upward angle on your shot not only gives a dramatic appearance, but also gives the ability to isolate the animal against a blue-water background, further heightening the visual impact.
We also see photographers who stay too far away from their subjects. There’s no question you don’t want to get so close to the animal that you spook it and lose the shot all together, but you also don’t have to stay 15 feet away. Getting closer has a number of advantages. One is that you’ll put less water between you and your subject. That alone will improve the shot and take out a lot of the bluish haze that water adds. Because you’re closer, you’ll get more strobe light on the subject. This means you could shoot at a smaller f-stop, use less strobe (improving recycle time for multiple shots), or maybe even both. As you get closer, you’ll also find that your color saturation on the final image will improve. And finally, the closer you get, the more you’ll fill the frame with your subject, which means you’ll have to do less cropping when all is said and done. (As my friend Mike Veitch says, “Crop with your fins.”)
Take a good critical look at your favorites pictures that you’ve taken and see if you can discern what it is about them that you like. Then look at images from some other photographer you like and do the same analysis. Do it with a couple of different photographer’s work and see if you start coming up with some common traits. Then see if those elements are evident in your own photography and—if they’re not—see if you can figure out how to add them in.
Learning what you think looks good and then figuring out how to incorporate that look into your images will set you on the path to good photography. It’s a long journey, but the ability to create stunning images is well worth the effort.

