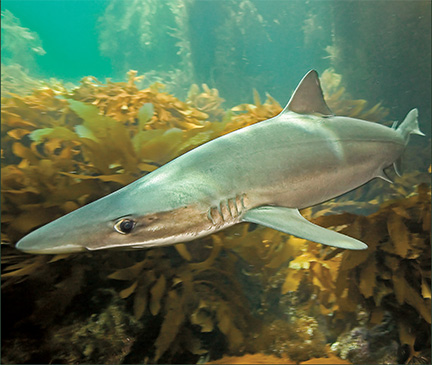

By Kim Sheckler • Photo by Dale Sheckler
Working with a photographer is one of the most challenging things I’ve ever done as a diver. I’ve been diving for 35+ years now, many of them as a photo subject for my husband Dale. Underwater modeling sounds like fun, and you might think it doesn’t involve anything more than swimming around and smiling, but I can tell you from decades of personal experience that working with an underwater photographer involves far more than smiling for the camera. In this article I’ll share suggestions that both the underwater photographer and his or her model will likely find useful.
Communication and Safety
As an underwater model a simpatico relationship with your buddy is a must, as you will be relying on nonverbal communications underwater. I’ll have to tell you lack of cooperation between the model and photographer buddy can really put a strain on a relationship, underwater or otherwise.
Safety is of course, as with any diving venture, of paramount importance – but even more so while diving as a model and photographer buddy team. It’s important that you agree on depth limitations, turn around air consumption time, etc. Do your pre-dive gear checks not only for safety of course but also being attentive to loose floppy ends of gear (straps, gauge consoles, safe seconds, straps, etc.) which can not only ruin photos but are part of common sense diving in kelp and will help preserve delicate reefs.
When diving together taking shots modeling around a particular subject be attentive to each other’s breathing gas consumption, depth and bottom time. Check more often than usual. You might be surprised that you both burn through more breathing gas while working to get good images. Be careful that you do not become so engrossed with your photographic goals that you lose track of critical dive data.
Go for the Goal
What is the goal of the dive? Shooting nudibranchs is much different than pictures of giant black sea bass. As a photo subject, having basic knowledge of underwater photography is helpful. Learn the various lenses your photographer dive buddy will be using, including how close you should ideally position yourself for a variety of shots.
Wide-angle is used for large or larger subjects such as schools of fish, big fish like big sheephead, giant black sea bass, sea lions, kelp forests and reef vistas. Macro is for close-up in tight and models are only occasionally used but can be especially effective you develop a dive plan in advance. Wide-angle photos and macro photos need a very different mindset, so know the goal and incorporate it into your dive plan.
The Plan
A good chunk of diving safety and a good buddy system is having and keeping a dive plan. This is even more important between you and your photographer buddy. Create a dive plan taking into consideration reef, kelp, depths, currents, entry and exits, etc. Carrying a camera in diving situations, especially a large rig, can be restrictive and you need have a plan and you need to be cooperative. Diving in surf, heavy seas, currents, and thick kelp can be challenging and you can be a big help. Plan your dive accordingly.
One thing that I have learned over the years is that communication is the most important thing you could ever do and the first place to start. Granted that is an important rule with any dive buddy, but if you don’t have a plan before the dive starts you will not have good photos at the end of the dive.
Beyond your normal diving hand signals, including a good knowledge of regular hand signals, agree on hand signals for posing. Your photographer buddy can be quite demanding (Dale) and an understanding of what is being communicating will keep the peace as well as make for better images. You and your photographer dive buddy should come up with and review hand signals for a variety of situations, including: move slowly across the field of view, go around, back away from the subject, or draw in closer. Plan to carry a dive slate with you. On it, write down a list of potential shooting/modeling scenarios that you can point to rather than having to try to communicate by signing.
Keep It Clean
Try to avoid getting the water column in front of the camera “dirty.” Cloudy water destroys clarity needed for superior pictures and particles can cause backscatter “snow” that detracts from a good photo. These days, post-dive edits using Photoshop or Lightroom or similar photo manipulation programs allow you to digitally “erase” backscatter and correct a wide range of “bloopers” but you’ll always be better off to minimize the potential for backscatter.
First and foremost an excellent underwater model must have expert buoyancy control. Your stillness or precise actions in the water column can mean everything.
Be aware of your body movements and what parts of your body are touching the sand. Even the California reef rocks are frequently covered in particulate matter that can easily be stirred up if you make an errant fin kick or wave of the arm. Your exhaled breath can cause silt and organic matter to “rain down” upon you, wrecking the scene. Where your bubbles are going can sometimes be just as important as where your feet are.
Be aware of the current. If a current is present, try approaching your target area or subject downcurrent. By doing so, any particles you stir up will drift away from you and out of the shot.
Thinking Like the Photographer
You need to think like the underwater photographer and frame the shot just as they would only in reverse. I have learned to look at the underwater world the way the photographer looks at it—so my perspective is flipped. How will the shot look, where will I pass be in the frame and where will the animal life be in the frame? What is the natural lighting and what will the background look like? If you look at the scene from the other perspective you will better set up the shot and know what to do and where to go.
Positioning Your Body
Body posture is extremely important. You want to look natural. You want to look like a diver enjoying the underwater world. You want to draw the viewer into the image and have the wish they were there. Avoid posing in unnatural positions. Instead of craning your neck to view marine life in the scene, align your body in a natural, comfortable position. Anything that feels weird will probably look weird.
Fine control of your body can also help you adjust your position next to a skittish marine life subject. You don’t want to scare away that one in a million chance of getting the perfect photo because you were clumsy.
Remember you don’t want to scare away the subject animals. Where you are in the water column means everything. Probably two-thirds of the creatures you will try to photograph in the underwater realm will not let you approach or at least not sit still. When you approach from above, you will cast a shadow on the subject matter or present a large silhouette against the light surface background. You will essentially look like a large predator dropping down to pounce on them. They will be inclined to flee, so instead, get low and move slowly. Getting low will reduce your body profile to one of a much smaller, head on view. Moving slowly will also present you as less of a threat. Slow movement will allow you to bring your breathing down to a slow, rhythmic pace. While this will not eliminate the roar of your bubbles, the steadier breathing pattern gives your subject something easier to get used to.
Once you find the subject and are in place, stay still, or at least move very slowly. Chasing a subject rarely works. And after the photo, just don’t run off looking for the next shot. Watch what the photographer is doing and wait for further instructions. It’s likely he or she will want to take several shots before moving on.
The Natural Environment
Understand the animal’s behavior and their habitat. Big sheephead, for example, will approach closely if you take the time to bang and rub rocks together. This will “ring the dinner bell,” so to speak. The noise simulates the way they eat. Sheephead chew and scrape food from the reefs as well as grind up. Breaking up urchins, by the way, while drawing fish closely, will put a lot of crud in the water, prompt unnatural behavior, and kill another animal for your benefit. This is just one example of behaviors you can use to get animals to work with you in a perfect pose for the camera.
Equipment Considerations
You can’t always have control over what color your gear is, but keep in it mind when making that purchase, that a bright orange snorkel may not look so great with an aqua mask. Fluorescent yellow hose protectors detract from any photo. If possible try to be consistent with your gear colors. My color choices are, by the way, black with enough red to stand out from the all too often dark California dark background. The red pops in the artificial light of the strobe yet mutes to a dark grey at depth less likely to frighten skittish fish. A light aqua blue also works well.
Your mask choice is important. For macro, mask frame color should be neutral or something that accentuates your eyes and face. Another one of the reasons I use red as it works with my brown eyes. Some photographers like to have their model wear a clear silicone mask, which helps accentuate the model’s eyes. Likewise, the photographer may prefer a single-lens mask to a dual-lens mask, because the single lens allows more of the model’s face to be visible. Speaking of the eyes consider using cosmetics such as eyeliner and eye shadow to accentuate the eyes. This works for men and women.
Eye Contact
Most skittish marine life are very sensitive to eye contact from other marine creatures, including the underwater photographer. If you just can’t seem to get close to a particular fish, try approaching it from an angle where it cannot see your eyes. Try a sideways angle where you are looking out your mask at an angle.
Modeling for Macro
When taking macro up-close photos you need to stay close to the photographer and help him look for subjects. Stay off the reef (a good thing normally anyway), as you don’t want to scare away little critters. Find out ahead of time if your photographer wants diver interaction.
Divers can be part of a macro photo if you plan ahead and can communicate underwater. Have you found a brightly colored nudibranch on a blade of kelp? Move in slowly and get right up next to the kelp blade. Don’t look at the nudibranch with both eyes; it will come across on film as being cross-eyed. One trick to make it appear that your eyes are on the subject is to “look through” the subject rather than straight at it. You are essentially throwing your eyes out of focus on the subject. It gives the impression you are gazing intently on that little critter, but your eyes stay straight. Focus with the eye directly in front of the subject and the camera lens. If your buddy wants you out of the macros, stay away. Do not scare the critters and keep your eyes open. While he is taking the pictures you can scan the reef for the next subject.
Wide-Angle Posing
When using a wide-angle lens, it’s likely your entire body will be visible in the shot, so keep your body position as natural as possible. No arm flailing or widespread legs. If it appears you are swimming through a cave, don’t let your fins come in contact with the walls; it takes away the whole illusion of the “swimming” process. Pay careful attention to your leg and arm positions. You want to look as if you are actually swimming, even though you are often holding position and just barely making a kicking motion.
Remember your certification class that stressed breathing regularly? It is even more important when taking photographs. If you are in the photo, you breathe normally and the photographer will know exactly when to expect the exhalation of bubbles and will be able to take the picture at just the right time.
If you are swimming through that kelp bed with fish in the photo or a wall at your side or anything else that makes that shot beautiful, focus on something. Avoid looking directly into the camera unless you and the photographer agree ahead of time that it’s the look you’re after. You want to bring the viewer into the world with you. It is not a time to take your regulator out of your mouth and smile intently into the camera. The largest piece of underwater photography gear you’ll own is your body, especially your eyes. Use it to your advantage, not as a hindrance.
The Demands and Rewards
As I stated previously, being the photographer’s buddy and model is demanding. But nothing is more fun than reliving that dive and actually seeing the finished product, an image of you interacting with marine life or being one with the underwater world. To have a permanent record of your dives is a great reward for all your effort. Nothing beats the look on my grandmother’s face when she tells her friends that the photo is of her granddaughter.