 Underwater photography involves a lot more than just making a dive and tripping the shutter. In last month’s issue of California Diving News I delved into the things you need to do before you dive to be sure your camera system is set up properly, and how to address the challenges of California diving. Here I’ll discuss some best practices for dealing with your images after your dives so you can find them, avoid losing them, and manipulate them so that your photographs look the way you want them to.
Playing “Finders Keepers”
As an underwater photographer, if there is anything that will drive you absolutely mad it is not being able to find a particular photograph in your image library. You have a great shot. You know it is on your computer or an external hard drive somewhere, but for the life of you, you can’t figure out where somewhere is.
Here is a far worse scenario. Imagine storing your entire library of underwater images on a single hard drive – and that hard drive fails. Perhaps, by spending a few thousand dollars in computer tech support you can have the image files saved. Perhaps, after spending the money, you’ll be told nothing could be done to retrieve those files.
These are, indeed, two nightmare scenarios that all photographers need to be aware of in the digital era. The good news is that both of these scenarios are preventable. If you do things the right way, finding and backing up images can be a snap. So, let’s get into the things you want to do to make sure you don’t learn hard lessons the hard way.
First Step: Back Up and Back Up
And back up. It makes perfect sense that the first thing we want to do after a dive is download images onto our computer and start to manipulate them with post-capture software such as Photoshop or Lightroom. But for safety’s sake it makes a much better sense to backup image files before you do anything else. A lot of professional shooters back images up onto two separate hard drives so they have three verified copies of their images before they begin to view, edit and manipulate image files, and before they reformat their media card. Some people think two back-up copies is overkill, but redundancy goes a long way toward preventing disaster.
As the pros say, there are two kinds of hard drives; those that have died, and those that are going to. The obvious takeaway message is to download and back-up your images onto another hard drive or two. Don’t just read these words. Develop the habit, and don’t break it.
Editing Starts With Deleting
While there is not a single right way to deal with your images in the post-capture phase of your workflow, editing images is a logical next step. Start by deleting all of the shots that you absolutely know will never have a useful purpose. Getting rid of the “garbage” makes the rest of your process easier and faster.
My personal method is to import my images into Lightroom, a digital asset manager (DAM) software program made by Adobe. I usually edit my images from within Lightroom, but sometimes for the sake of speed, I use a program called Photo Mechanic before importing my already twice backed-up image files.
Keywording Is Key
In the digital era the use of keywords is the key to finding images in a timely manner. Keywords are words you add to the metadata of an image file to make images easy to find. They are the words you enter in “search boxes” when using online browsers to locate information about a given topic.
The use of keywords means you won’t have to remember when or where you took every picture of every subject in your image library, and then look in folders for every trip you have made to each destination to locate the desired images. Instead you use keywords that you attach to image files to “call up” those images on your computer. That’s a beautiful thing!
The best time to add keywords is immediately after your initial edit before you start manipulating images. If you keyword before you manipulate images the keywords will be attached to every version of your images as you go forward. This means you won’t have to manually add the same keywords to different versions of the same image. Clearly, keywording images on the front end saves time and makes all versions of an image easier to find.
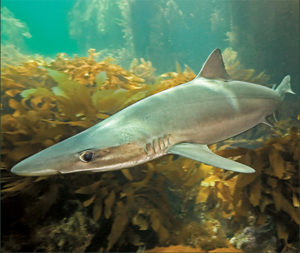
A number of software applications allow users to add keywords. You can add as few or as many keywords to a single image file as makes sense. The keywords I have attached for an image of a soupfin shark include “soupfin, tope, shark, kelp, California, Channel Islands, San Clemente Island, Pacific, North America, United States, and predator.” I can quickly find this image by conducting a search of the 250,000-plus images in my photo library with any of these keywords.
Develop A File Naming Convention
In addition to keywording it is very helpful to develop a folder and file naming system. The files produced by cameras are usually named with some sequence of letters and numbers that don’t mean anything in terms of what the picture is all about or when it was created. For example, the name of a file produced by one of my cameras is _86A2344.CR2. However, file names can be very helpful in identifying and locating an image.
The best practices guide for digital photography suggest re-naming image files in the following manner: For a given trip or day of diving, create a master folder that is named according to the first day of the trip and the location or subject. Every time you download a card of images create a sub-folder that is named according to the date, subject and download number for that day. For example, on a trip I made that began on August 24, 2019 I named my master folder 20190824_Channel Islands. The first sub-folder of downloaded images is named 20190825_giant sea bass_01, and the first two images in that folder have been re-named 20190825_giant sea bass_01.001.dng and 20190825_giant sea bass_01.002.dng. When re-naming, the last three numbers are applied automatically by my software when I convert my Canon RAW files to dng files.
Image manipulation software programs allow you to rename files in batches, a task that can be performed in a matter of seconds.
The reason I begin the names of my image files with the year, month and date is that computers are made to “think” in chronological order, and if I ever lose a file I can locate it via the “find” function on my computer by typing in the date or part of the date when an image was acquired. Only using a destination or subject name can work, but you need to be consistent when you assign names. You don’t want to name one folder “Point Lobos” and another “Dives with Chris” because you might have to remember those exact names at a later time to locate those folders unless you have also keyworded your images.
Calibrate and Profile Your Monitor
Have you ever looked at a picture on your computer screen, and altered it with your software so the image looked stunning, only to take the image file to a printer and have the colors in the final print look awful? There is a natural tendency to blame the printing facility, but the odds are the fault lies with not calibrating and profiling your computer monitor.
The acts of calibrating, profiling and selecting a color space enable you to provide images to a printer or show them on a projector in a form that the printer or projector should be able to accurately reproduce. Calibrating and profiling are the foundations of your photographic house.
Calibrating your monitor means using known standards such as a color chart and specialized hardware and software to apply those standards to adjust and set color parameters on your computer. Profiling means taking the known state to the conditions you are working under. Consider that the same picture will look significantly different when viewed on a computer monitor in a brightly lit room and a dark room. Same image, different looks. Calibrating and profiling eliminate this problem and provide accuracy and consistency.
Pros check the calibration of their monitor about once a month, but profile their monitor every time they use it to manipulate images.
Now It’s Time to Work on Your Images
At the very least, you will probably want to be able to perform basic post-capture image manipulation on your computer. You don’t need to become a Photoshop guru, but you will want to acquire some kind of image manipulation software and learn some basics so you can crop images and remove backscatter etc.
Most photographers don’t manipulate an image until they have specific use for it such as showing the image in a slide show. At that time they “tweak” the image and save a copy of that image that matches the needed usage in terms of size, the sharpening required, and color space.
Image Storage
Accepting the fact that all hard drives are eventually going to fail, it is only logical to conclude that you need to back up your images onto separate hard drives. Good photographic workflow dictates at least two back up copies of your complete image library, and many pros keep an additional copy at a separate physical location to protect them from losing their library in the event of a fire, flood or other disaster.
Clearly, there is a lot more to underwater photography than just going diving and taking pictures. Upon first consideration, all of the other aspects can seem off-putting. However, mastering these parts isn’t nearly as difficult or time-consuming as it first seems, and it is these aspects that allow you to make your photographs look their best and easy to share.
Converting to dng Files
If you shoot RAW files, no matter who makes your camera, it is highly recommended that you save a copy of your files as dng files. Some people convert their native camera RAW files to dngs. Others make a copy, so they have both the original files and a dng copy of their original files.
Given to the world by Adobe, the dng format is a universal RAW format that saves original out-of-camera RAW files to uncompressed dng files. The purpose of dng files is to “future proof” images against the possibility that image files created today will not be supported or able to be read by computer operating systems in the future. DNG is a type of “open source” file, meaning anyone can freely use or edit the file. As photographers, we can edit dng files just like RAW files and we can use dngs for archival purposes. DNG files are supported by most image viewing and editing software.