Hey Dale:
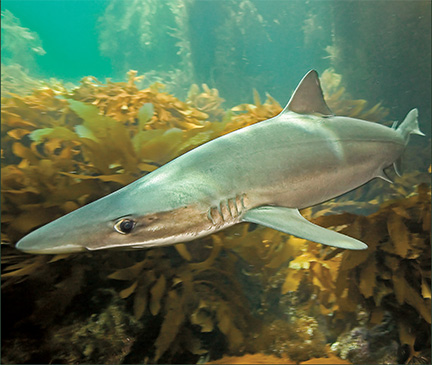
To dive in California means diving in kelp forests of amber-colored viney plants that invariably snag on tank valves and fin straps. What a pain in the neck! In reality, though, kelp is the basis for our oceanic ecosystem. Many animals depend on kelp for both food and protection. Humans use kelp in many common everyday items, such as salad dressings, cosmetics, beer, ice cream, and other products.
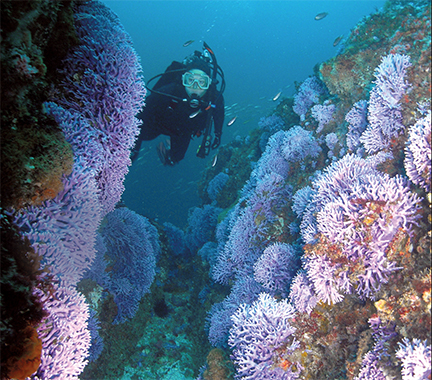
To many underwater photographers, kelp often serves as a beautiful, natural background for stunning photographs of other divers, garibaldis, sea lions, and many other sea creatures. However, what is often overlooked is kelp’s true beauty and potential for serving as the main subject for some truly stunning images.
My first few experiences with photographing kelp were usually on safety stops when I had a few extra frames left in the camera and nothing else interesting enough to photograph. Later, when asked by co-workers to share my pictures from recent diving trips, they immediately were drawn to snapshots of kelp. After a couple of offers to purchase a few of my kelp images and one kelp photo that won a “Best of Show” in an underwater photography contest, I began viewing kelp in a completely different perspective.
Kelp can be photographed in two different ways: first as a whole, showing the vast immense size of a kelp forest; and secondly, by its parts, showing detail and unveiling its true beauty when viewed closely.
My recommendations for photographing a kelp forest are simple. First, pick a nice, calm, sunny day in the fall when visibility is excellent. From your camera bag, place on your camera the widest angle lens available, perhaps a Nikonos 15mm, Sea & Sea 16mm, or the widest angle lens suitable for a housed system. Turn your strobe(s) off, meter for available light, turn the camera in a vertical position, and bracket your exposures. Barring any major disaster, you should be able to capture some vivid photographs of a great kelp forest.
My favorite kelp photographs are close-ups. I feel I can far more successfully capture the beauty of kelp by photographing its parts rather than a whole kelp vine or kelp forest. In my opinion, the leaves and pneumatisis (air bladders) make for great photo subjects due to their color, texture, and countless pattern possibilities. I find it easier to photograph kelp with extension tubes and framers, and I will state my reasons why. First, since kelp for the most part is a static photographic subject, it is easy to compose within the framer. Secondly, composing within a framer, as opposed to looking through a viewfinder, readily allows the photographer to see the direction the strobe(s) are pointed. Inevitably, one’s strobe will get covered by a kelp leaf and will not effectively illuminate the entire subject. As for which framer to use, it’s a toss up. That decision can only be made by the photographer and by what is envisioned to be the perfect kelp image.
As for illuminating macro kelp shots, it is in my belief that one strobe can sufficiently create dramatic kelp images. If your camera system has TTL capability, by all means use it. If you are a manual kind of person, understand how your strobe’s guide number works, taking into account the extra light needed when shooting though extension tubes.
Regardless of how you shoot macro kelp photos, the underwater “Golden Rule” applies: Do not light the water between the lens and subject. Nothing is worse than a beautifully composed, well-exposed image that contains a few specks of suspended particulate matter. This is why the underwater photographer must pay so much close attention to proper strobe placement.
One last thing to remember is that buoyancy control can play a key role in creating great kelp macro photos. Some kelp forests can reach heights in excess of 100 feet. Perhaps you have found your perfect shot in the uppermost 30. Try not to kick or disturb the kelp too much as you carefully compose your image, for disrupting the kelp will only lead to more particulate matter in the water column and, ultimately, more backscatter in your photos.
I find it more successful photographing kelp if I just flow with its gentle movements. If I lose one opportunity, the next will present itself shortly; you just have to look around. When such an opportunity does arise, spend some time shooting a complete roll of film. Sometimes just a subtle change in the kelp’s position might make the difference between the kelp photo you frame and hang over your fireplace or the one that hits the round file.