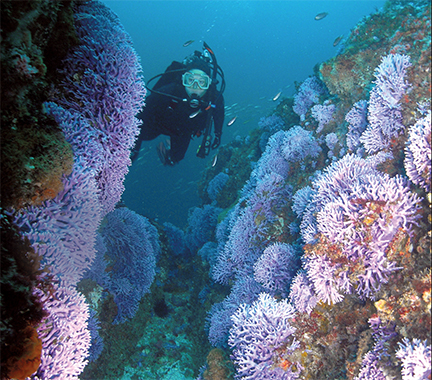
A pair of playful, bright-orange garibaldi frolic in the foreground before the silhouette of a diver hovering in the midst of a thick, rich kelp forest as the beams of sunlight pierce through the canopy of kelp gathered at the water’s surface. To many, myself included, this is the definitive image of what diving in California is all about.
However, if the kelp forest’s edge is the final boundary for the exploration of beautiful images while diving in California, one may well be missing many great photographic opportunities by just a few feet. On your next dive, depth and bottom-time permitting, spend a few minutes combing the underwater sand dunes surrounding your favorite kelp forest dive spots. What you find there may surprise you.
The sandy areas just beyond the kelp forests are home to many unusual and interesting marine creatures — halibut, bat rays, tube worms, and mantis shrimp, to name a few. However, photographing these animals in their sandy habitats can be a lighting and backscatter nightmare.
With the subject in your viewfinder or framer here are a few important points to consider.
GOLDEN RULE
The “Golden Rule of Underwater Photography” states: DO NOT LIGHT THE WATER BETWEEN THE LENS AND YOUR SUBJECT. This will eliminate the majority of potential backscatter in your images.
SAND COLORS
Not all sand is the same. Since sand comes in a multitude of different colors ranging from black to white, a successful underwater photographer needs to recognize this and make adjustments to attain properly exposed final images. Realize that when shooting TTL (through the lens), light-colored sand will reflect a great deal of light, often fooling the camera to underexpose, resulting in photos of sand with a dark and muddy appearance. Inversely, dark-colored sand will absorb a lot of light. Your camera system will again be fooled, this time causing over-exposure thereby lightening the darker sand. These lighting brain-teasing problems may be resolved by simply bracketing with either the EV settings available on many camera systems or with the ASA/ISO control on your camera. If you prefer to use your strobe(s) manually, a simple understanding of the strobe’s guide number will all but eliminate exposure problems.
SAND GRADES
Sand also comes in many different texture grades from fine to coarse. Realize that coarser sand settles faster and is, therefore, more photographically forgiving than finer sand particles. If possible, positioning yourself down current will help reduce the amount of sand stirred up in the heat of the photographic moment.
GET CLOSER
Try to fill the frame with your subject. With proper strobe placement, filling your frame will eliminate a lot of negative space and areas in which backscatter might detract from your final image.
CAMERA
I prefer to use a housed camera system with a macro lens. A housed camera system allows a photographer to more easily spot potential backscatter as it drifts through the field of view. But use what you have. Just realize the system’s limitations and, as always, work within them.
LIGHTING
An underwater photographer may be very successful photographing sand critters by using only one strobe. Light-colored sand may serve as a natural-light reflector, illuminating shadows typically created by a single strobe.
BACKGROUND
A flawless, backscatter-free background is not impossible to achieve, but don’t be too bold to not use what advantages nature has given you. A photographer may very successfully utilize the sandy surroundings to blend light-colored particulate matter in the background seamlessly.
Lastly, spend some time studying the sand critter on the other end of your lens. Approach slowly and recognize the slightest signs of stress in your subject, for if you scare off a potentially great sand critter photo opportunity, you might find yourself back in the kelp forest photographing garibaldi.