We would all like to dive in water with 200 feet of visibility, bright sunlight and a plethora of photogenic critters. Well, sometimes we do, but many times we do not have visibility quite that good. While it is unlikely you will ever get as good a photograph with 10 feet of visibility as you would with 200, it is possible to get acceptable images with the right equipment and technique.
There are three problems with photography in poor visibility. First, the particles in the water scatter light and produce soft images. Second, the same particles reflect strobe light, making your image look like it is covered by tiny stars. Photographers call this backscatter. Lastly, the poor visibility reduces available light at depth, making the balancing of ambient and strobe light very difficult.
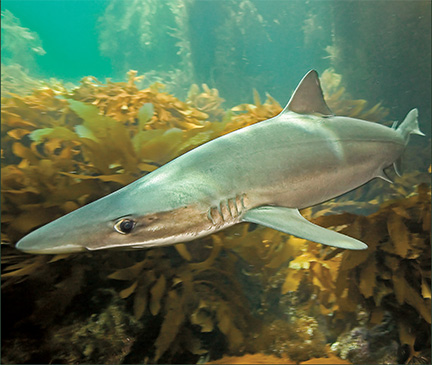
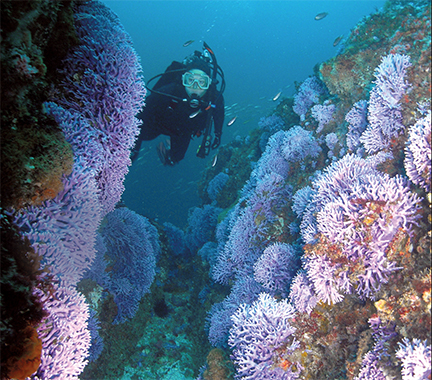
The surest way to improve your photography under these conditions is to get close to your subject. The idea is to drastically reduce the water and, consequently, the suspended particles between your camera and your subject. This means close focusing, macro lenses for small critters and close focusing, ultra wide-angle lenses for larger subjects, particularly divers. A macro lens with a focal length of 50 to 60 mm is about perfect for photography in California waters. A longer lens will force you to work at longer standoff distance and allow more particles to get in the way of a good image. For diver shots, get the widest lens you can afford. A lens with a field of view of 90 to 100 degrees is good, but a fisheye lens with a field of view of 180 degrees is often better. You will get more distortion with a wider lens, but such distortion is less obvious and less important than the effect of particulates in the water. Remember to get as close to your subject as possible and fill the frame with your subject.
How you position your strobe will either accentuate or minimize the effect of backscatter. The worst way to use your strobe is to position it on or near your camera. This will illuminate all of the particles between your camera and subject, and they will reflect a maximum amount of light back to your camera. Try to position your strobe away from your camera and illuminate your subject from the side. This has two effects. First, the particles that are illuminated are lit from the side and not from head on. Think of the difference in sunlight reflected by a full moon compared to a quarter moon. The particles the camera “sees” are still illuminated, just to a lesser degree. Second, proper strobe position illuminates your subject without illuminating the water (and particles) between your camera and subject. Learn where the inside edge of the light from your strobe falls, and position it such that it just catches the far edge of the subject. This takes a little practice, and I suggest exposing a test subject in a pool before heading out to the ocean.
These strobe techniques will minimize backscatter, but will also create side lighting with harsh shadows. Try using two strobes to produce a more evenly lit image with softer shadows. Some photographers prefer to have one strobe set at a higher power (2 to 4 times brighter) than the other, or one further from the subject. This will add depth to the photos and create a more natural, sun-lit appearance. However, I normally prefer to have my strobes of equal power and set to about the same distance to the subject. This produces an evenly lit image. Also, you will need to use long strobe arms that can be easily adjusted to get your strobe out and away from your camera and into an optimal position.
Correct positioning of your strobe will only allow you to minimize the effect of particles between your subject and lens; there still will be particles at the same distance and behind the subject that can ruin your photograph. So, in low-visibility conditions you will also need to choose your backgrounds very carefully. Backscatter will be less apparent if your subject is framed against a lighter, more reflective background rather than a darker background. Normally the worst background under these conditions is a black water background—each particle jumps out of the photograph.
A light background may be achieved by selecting a composition where the subject that is less reflective than its surroundings, or by selecting an extreme upward camera angle and back light your subject with the sun. Here is when a strobe with multi-power settings or one with TTL metering is worth its weight in gold. The trick is to open up the lens enough to properly expose the water, which may be f4 in turbid water, and to have a weak enough strobe to not overexpose your subject. In each of these cases backscatter will still be present, just less apparent.
In really murky water try turning your strobe off all together. Shooting silhouettes (with back lighting by the sun) or shapes without color (with front lighting) are often more appealing than a colorful image with lots of backscatter. Photographs taken in clear water are usually better than those taken under less-than-optimum conditions. However, with a little technique good photographs can still be taken under these conditions.