In becoming a good underwater photographer, your first hurtle to overcome is technical. You’ll want to first get your subject properly exposed and in focus. After that, composition is the next challenge. Composition is a bit more difficult because it is a creative process. And at the same time you’re trying to compose your shots in effective ways, you don’t want to lose the proper elements of focus and exposure.
There many common errors new (and many experienced) underwater photographers make when it comes to putting elements together in a shot (composition). Below are some of the more common errors and suggestions on how to correct them.
SUBJECT HAS NO PLACE TO GO
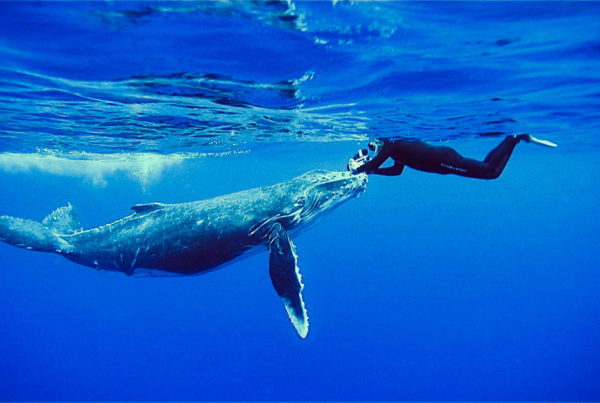
Although you may be taking still photos, for a truly effective photo you often need to imply movement such as with mobile fish and divers. You need to give room in the photo for the subject to “move ahead.” You simply need to leave more space at the head of the subject than behind.
A DIVER STARING INTO THE LENS
It’s great to have the cooperation of an underwater model for your underwater photography. Photos with other divers make more of a personal impact on the viewer allowing them to vicariously inject themselves into the photo. For an underwater model to be a good partner in creating underwater photos, the diver has to be willing to take direction and have an understanding some basic principles of underwater modeling. A diver staring blankly into the lens of the camera, for example, is rarely effective. Save this kind of photography for vacation “snap-shots.”
A DIVER STARING INTO NOTHINGNESS
Just as bad is your diver model staring off to an unseen subject outside the frame. What are they looking at? This kind of photo simply creates more confusion for the viewer and never makes sense.
NOT SEPARATING THE SUBJECT FROM ITS BACKGROUND
Subjects underwater vary considerably in color, texture and darkness/lightness. So do backgrounds. The trick is to make sure your main subject somehow stands out from its background. Sometimes this is easy—bright orange garibaldis stand out against almost anything, for example.
When you are shooting macro, there are several techniques you can use to separate your subject from your background. By being careful to not illuminate the background, or no background at all, your photo’s background will go to black and your subject will stand out strong.
The black background technique, conversely, does not work well with wide- angle photography, particularly with divers in traditional California blue or black neoprene-hooded garb. With a California diver and a black background you usually lose a good part of the diver’s head into the background.
Another way to separate the subject from the background is to throw the background out of focus while keeping the subject razor sharp. This is particularly effective because it gives the photo depth, making a two-dispensational image jump off the photo as three-dimensional.
Additional ways of separating subjects from backgrounds include contrasting colors and contrasting textures.
PUTTING YOUR SUBJECT SMACK-DAB IN THE MIDDLE OF THE FRAME
Putting your subject in the middle of your frame is great for snap-shots but if you want more you are going to have to think about your photo as have more of a distinctive pattern or asymmetry.
A simple rule is the “rule of the thirds.” Divide your frame up by thirds both horizontally and vertically. Where these lines meet will be roughly in the upper or lower right or left hand third of the photo. Put the main portion of your subject at this point. With fish, for example, the main emphasis of the photo is usually the eyes. Put the eye (or eyes) at the points where these lines intersect.


